How to Reset and Disable Google Authentication on BINANCE TH [WEB/APP]

You can reset and disable the Google Authenticator you use for two-factor authentication (2FA) by following the step-by-step guide below.
In order to protect your account, withdrawal transactions will be disabled for 24 hours after changing your authenticator.
How to reset Google Authenticator
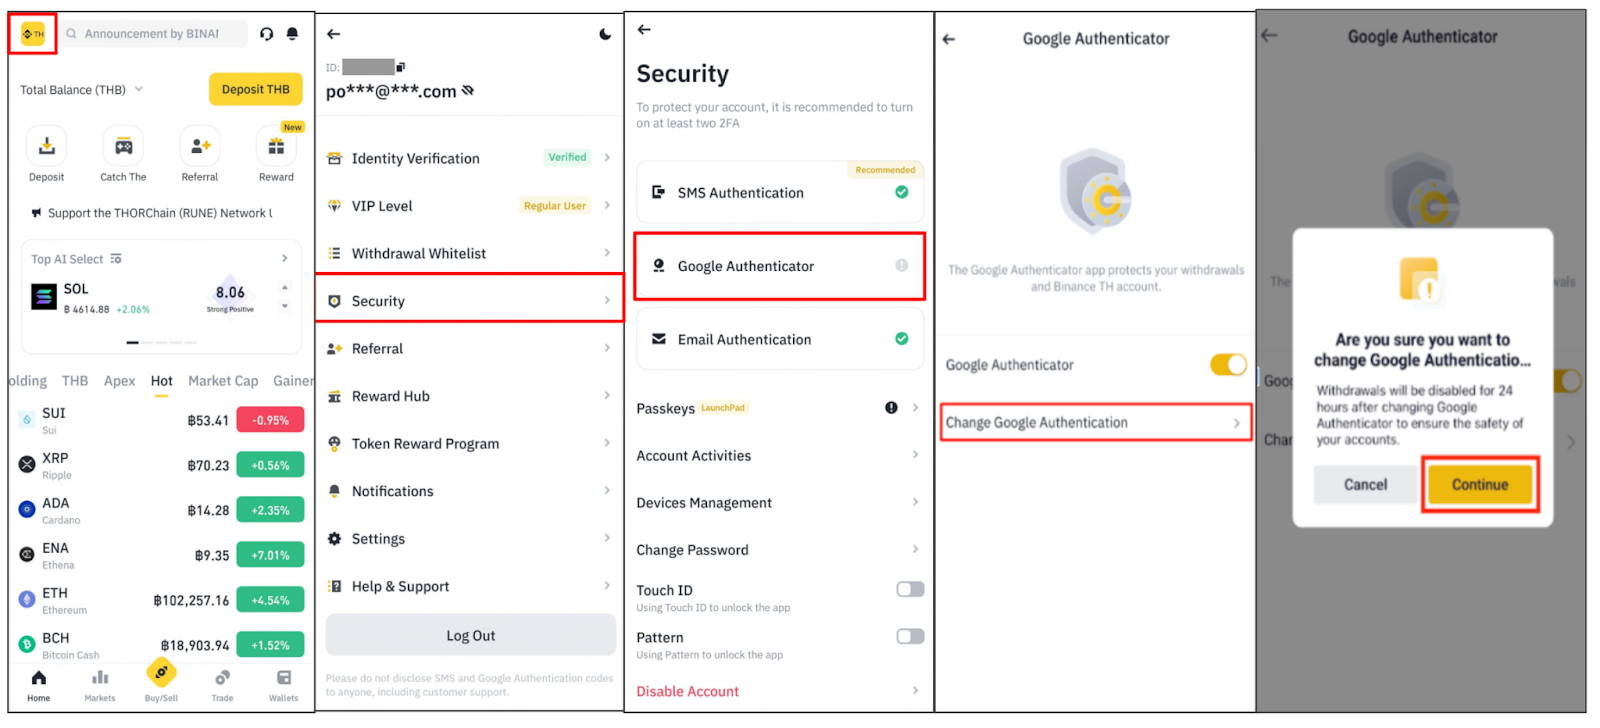
1. Tap [Profile] and go to [Security] then choose [Google Authentication] > [Change Google Authentication] , Read the notes carefully before tapping [Continue]. Please note that withdrawal transactions will be disabled for 24 hours after changing your authenticator.
2. Click [Get Code] for each verification method you have enabled. Enter the 6-digit verification code you received via email, SMS, or Google Authenticator, and press [OK].
3. You’ll see a 16-digit code. Enter the 16-digit code manually with your Google Authenticator. Please make sure you’ve completed this step in your Google Authenticator before tapping [Next].
Click [Paste] to paste the 16-digit code on the next page. Please complete steps 5 and 6 in your Google Authenticator app, then press the [Next].
4. Go to the Google Authenticator application, click the [Plus] icon at the bottom right, and select [Enter a setup key].
5. Name the key in [Account] and enter the 16-digit code obtained from the BINANCE TH application in the [Key] field, then click [Add].

6. Enter the 6-digit code from your Google Authenticator and tap [Submit].
7. Your Google Authenticator has been reset. Please note that withdrawal transactions will be disabled for 24 hours after changing your authenticator.
How to disable Google Authenticator
Website
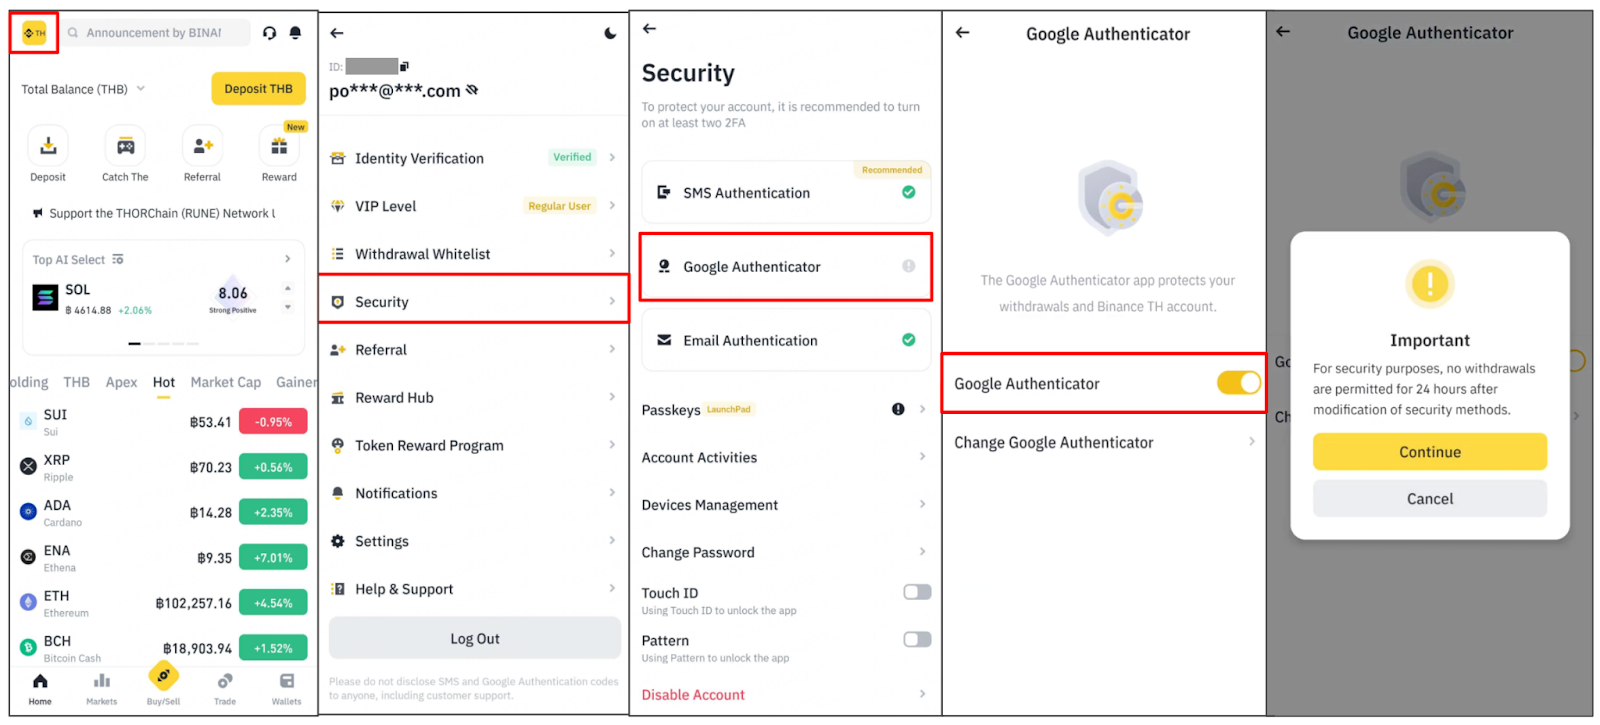
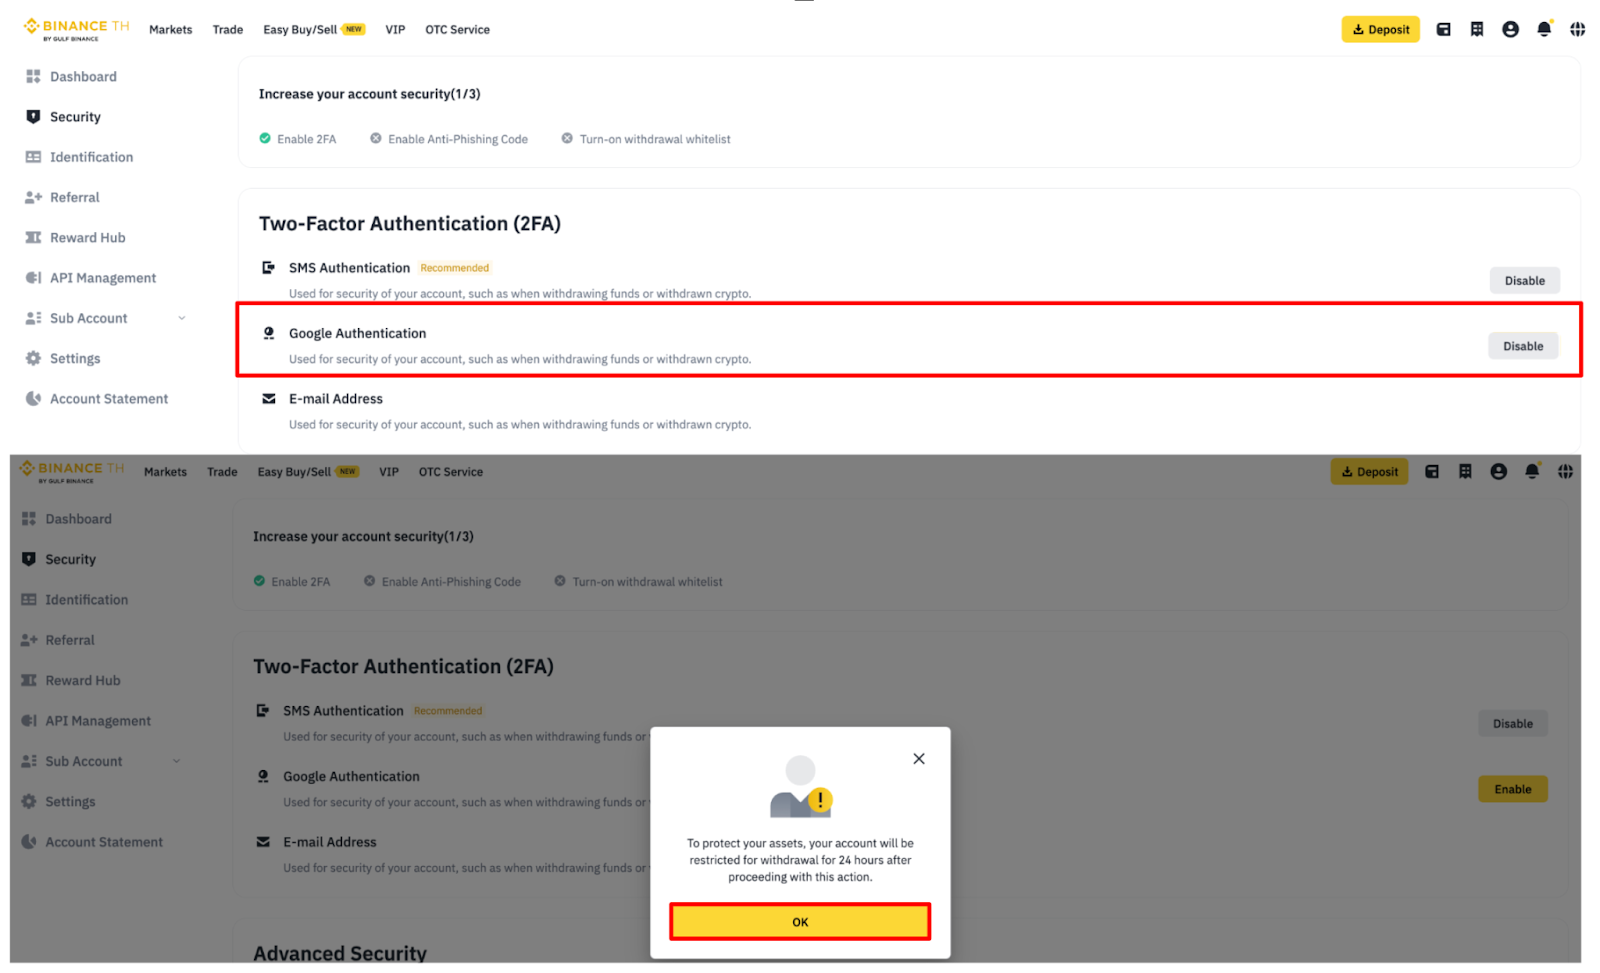
1. Log in to your BINANCE TH account and go to [Profile] - [Security].

2. Click [Disable] next to [Google Authentication]. Read the notes carefully before clicking [OK]. Please note that withdrawal transactions will be disabled for 24 hours after changing your authenticator.
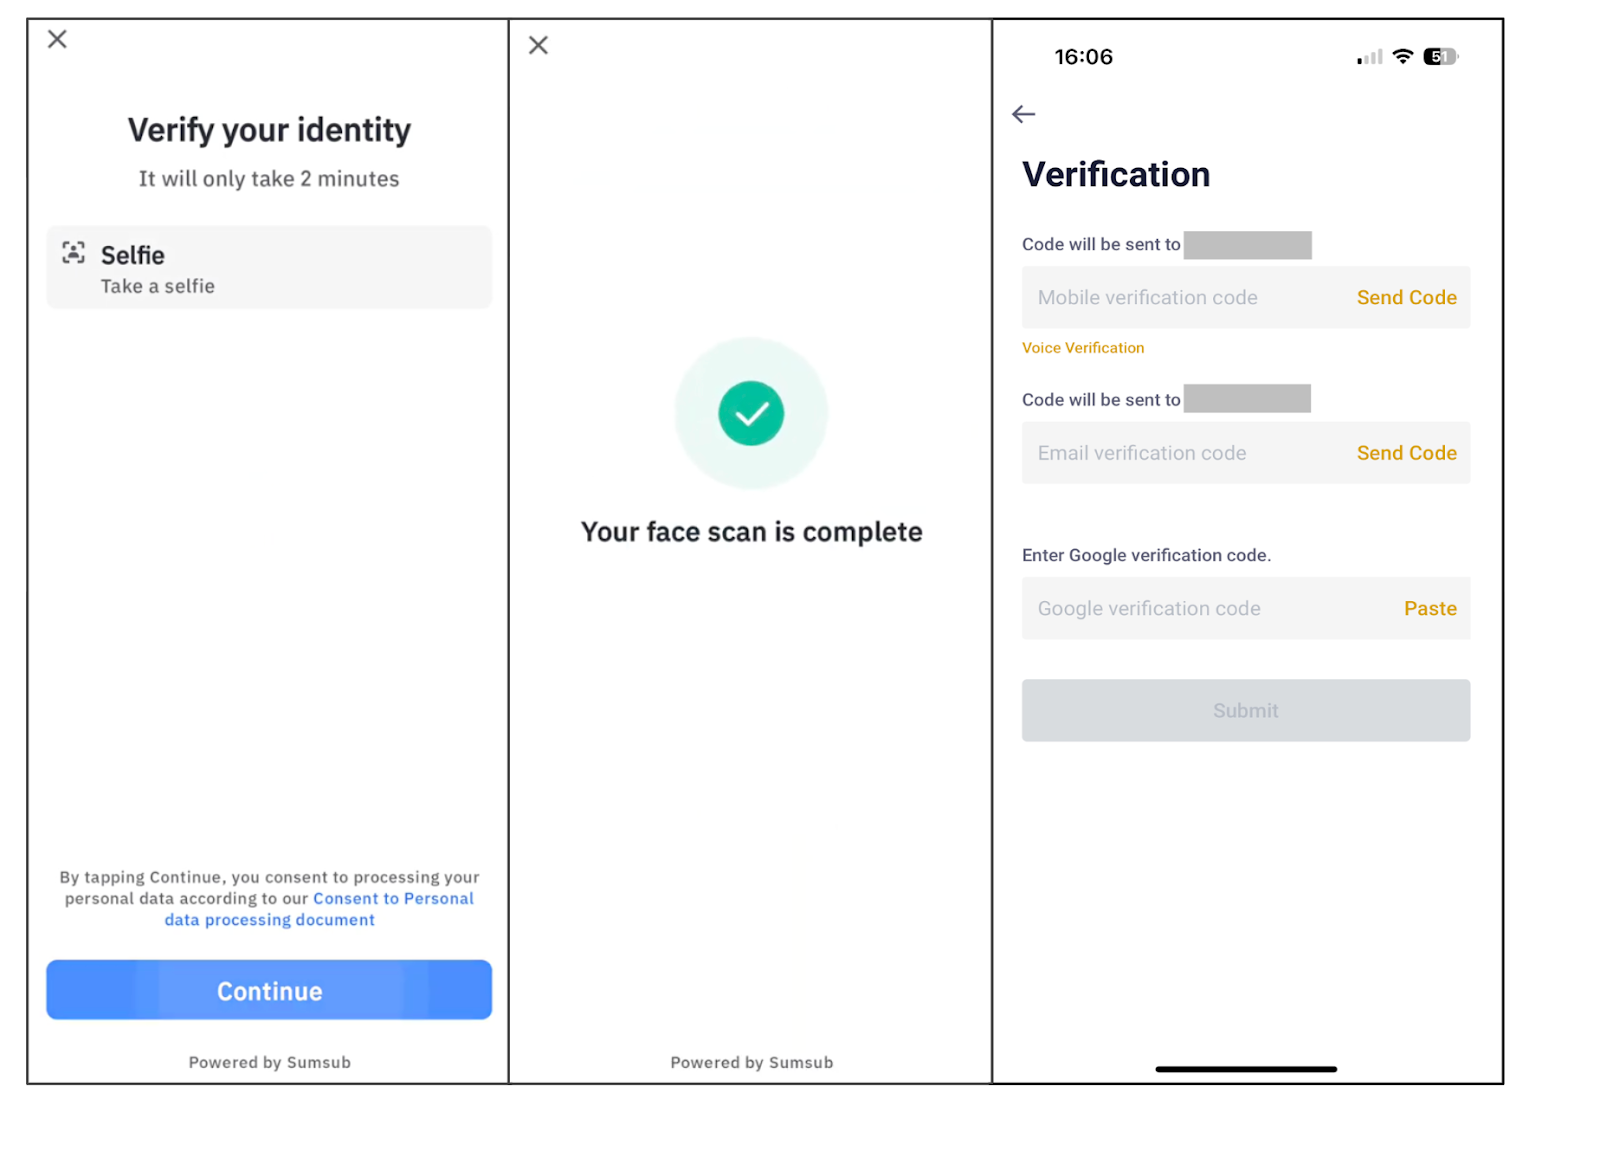
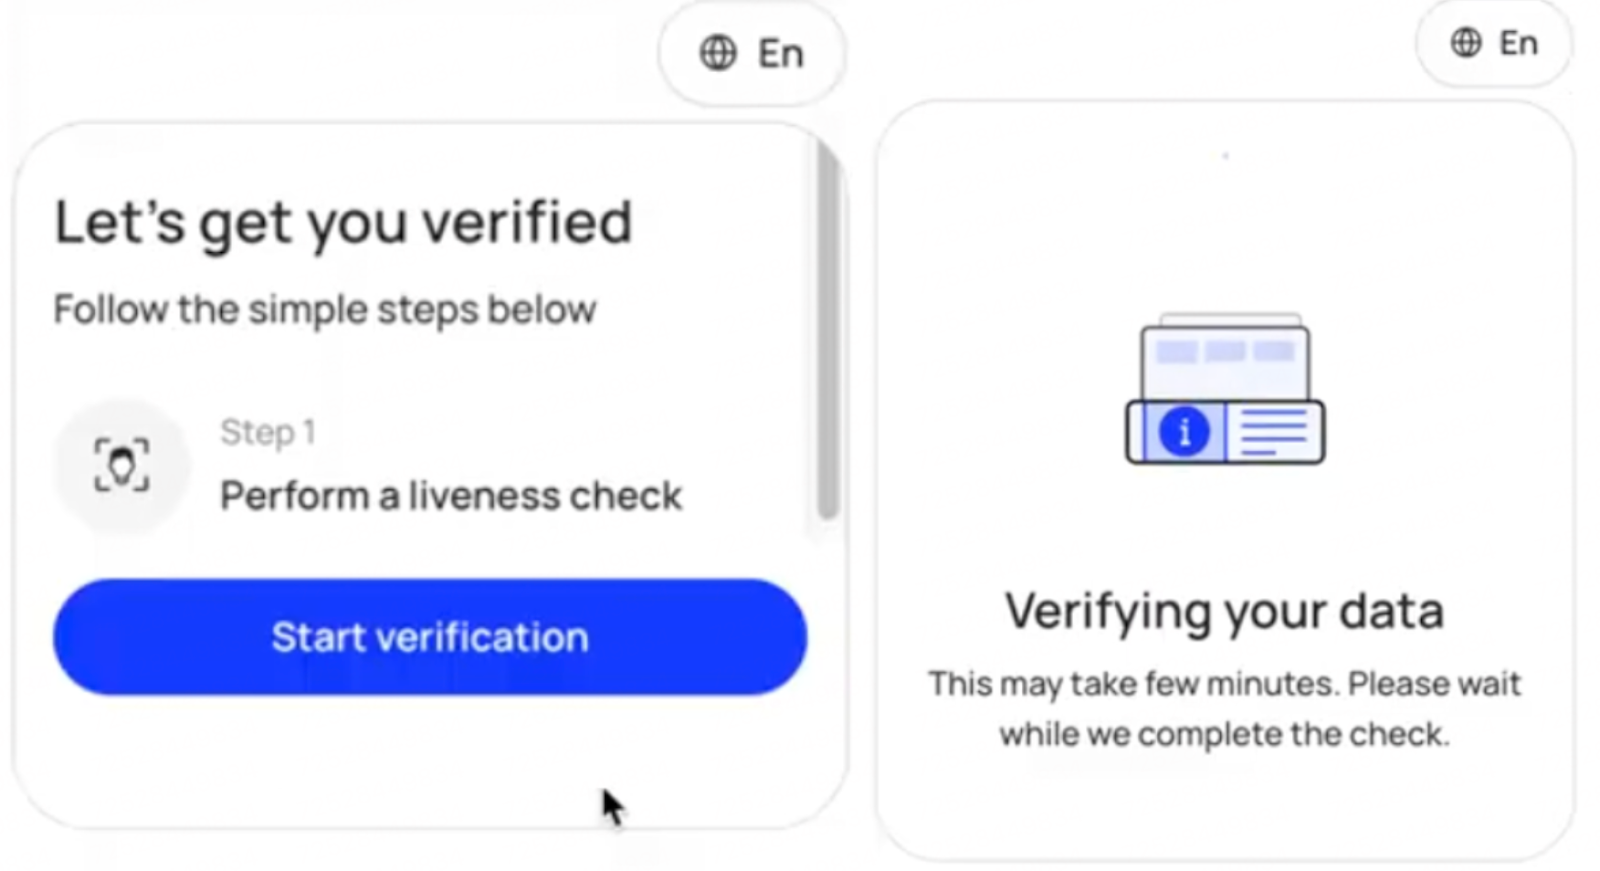
3. Complete identity verification by submitting a liveness selfie.
Note: You can choose to complete the face scan verification on your mobile device or on the website. To do the face scan on your phone, click ‘Continue on phone’ and then scan the QR code to proceed with the face scan.
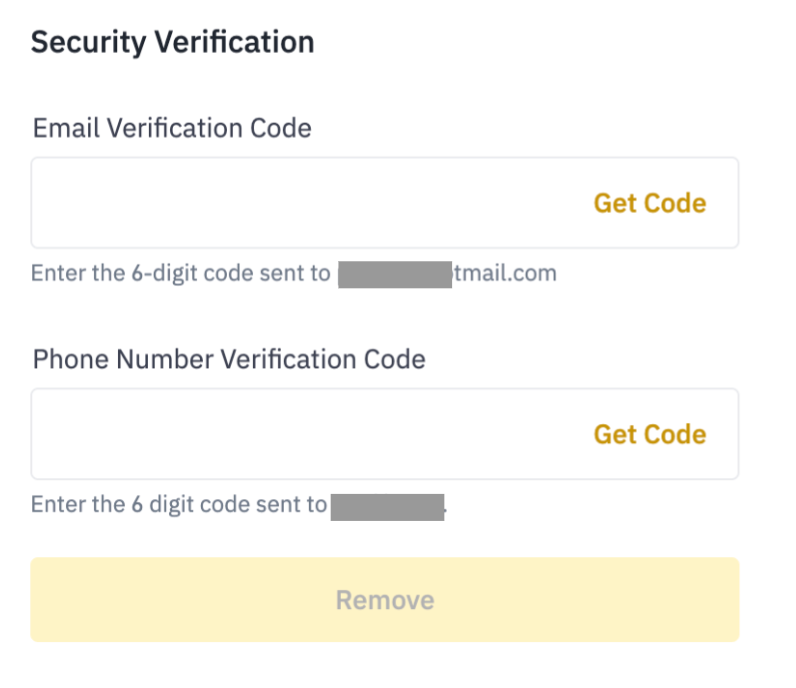
4. Click [Get Code] for each verification method you have enabled. Enter the 6-digit verification code you received via email, SMS, or Google Authenticator, and click [Remove] to confirm security.
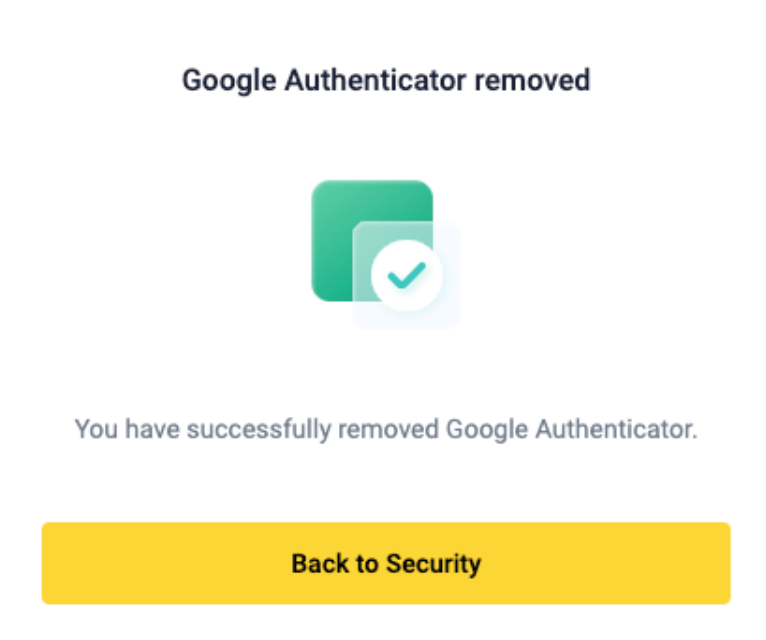
5. Your Google Authenticator has been removed. Please note that withdrawal transactions will be disabled for 24 hours after changing your authenticator. And you can back to enable Google Authentication please refer here.
Application
Tap [Profile] > [Security] > [Google Authentication] and slide the button to disable. Read the notes carefully before clicking [Continue]. Please note that withdrawal transactions will be disabled for 24 hours after changing your authenticator.
Complete identity verification by submitting a liveness selfie.
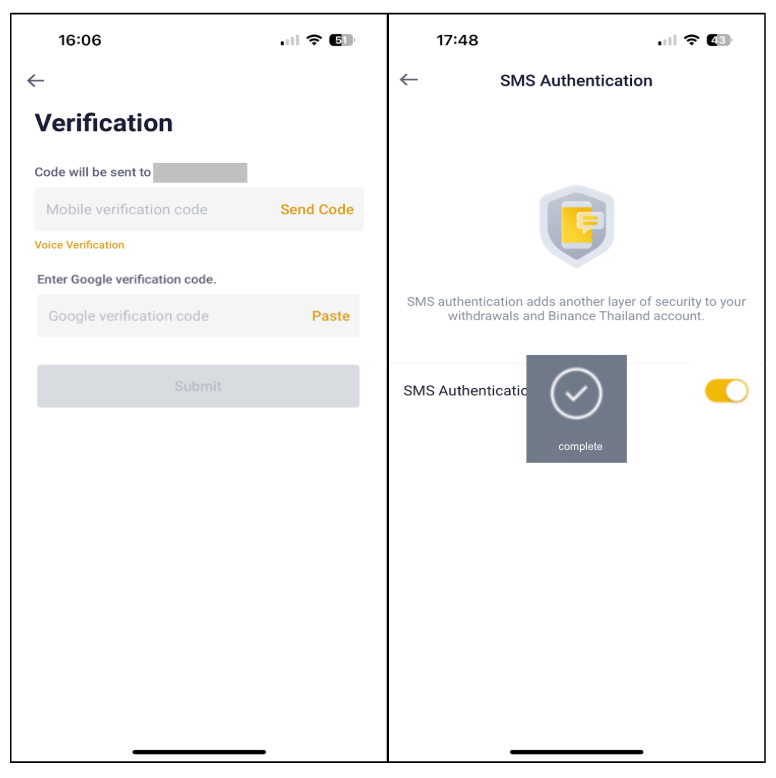
Click on [Send Code] for each authentication method you've enabled. Enter the 6-digit verification code you received and click [Submit] to confirm the security.
Google Authentication has been successfully disabled. However, you will need to use at least two authentication methods to withdraw assets or perform other transactions. If you wish to re-enable Google Authentication, please follow the activation steps, click.